Getting Started with Kubernetes on a Free Oracle Cloud Cluster - Traefik, Rancher, Longhorn, Wordpress

I've long been a fan of Docker (and containerization in general), but I've managed to avoid Kubernetes (k8s) for some time. Mostly because I didn't have a suitable environment in which to play around with it. That changed recently when I discovered Oracle Cloud and their very generous free offerings.
We're going to be setting up a cloudlab on OCI with a Kubernetes cluster. Traefik will serve as an SSL-enabled reverse proxy to Rancher (for k8s management) and Wordpress (an example service stack).
Oracle Cloud Infrastructure
Oracle Cloud Infrastructure offers an impressive suite of "Always Free" resources, including:
- 2x x86-64 (AMD-based) VM Instances
- 1-4x ARM64 VM Instances, with 24 GB of memory split between them
- 2x Block Volume Storage, 200 GB total
- 1x Flexible Load Balancer (10Mbps)
Get started here. You'll need a valid credit/debit card for signup, but you won't be charged anything. It may take a day or two for your account to activate. While you're waiting, you can go ahead and install OCI Cli, Kubectl and Helm. You should also have your own domain name. I use NameCheap as my registrar, with Cloudflare providing Authoritative DNS. Traefik supports these providers for LetsEncrypt SSL cert generation. You're welcome to use whichever you prefer, but this guide is aimed at Cloudflare.
Kubernetes
Once you've got everything above set up, it's time to dig in to the real meat and potatoes: Kubernetes. K8s is what's known as a "container orchestration platform." Here's a great analogy that explains how K8s works. Basically: there's Docker, a container engine, which can be thought of as a single cargo ship. That ship has any number of cargo containers, or "services" (i.e. Wordpress, mariadb, apache). Then there's K8s. It's the "eye in the sky." It manages the logistics needed for any number of those cargo ships to operate together: their manifests, communications, crew, routes, schedules, etc. In short, K8s manages clusters of containers. Make sense?
Now then, let's create your K8s cluster on OCI. From your Dashboard, navigate to Developer Services > Kubernetes Clusters (OKE). Create a cluster. Quick create. For our purposes, let's create a cluster with a Public Endpoint and Private Workers. You can name it anything you like. To take advantage of OCI's free offerings, the shape should be VM.Standard.A1.Flex. For OCPUs and Memory, choose 1 & 6 GB, respectively. With this configuration, you can create up to 4 nodes for free! Under "advanced options" you can choose to either import an existing SSH public key or generate a new private/public keypair. Keep that safe. Click Next to review, then Create cluster. It may take a few moments to come up, but once it's done you should see a green Active status. Once it's up, click the Access Your Cluster button for instructions on configuring kubectl. Select Local Access and follow the instructions to get kubectl setup to manage your cluster. Once you're done with that, run:
$ kubectl cluster-info
If you did everything right, the above command should output something like:

Now that we've got a working k8s cluster and a properly configured kubectl, we can start deploying some services!
Kubernetes Dashboard
This isn't strictly required, but it'll help you out in a pinch if you botch a few deployments and make your cluster inaccessible. Kubernetes dashboard won't be exposed on a public endpoint, but we can access it through a neat feature of kubectl: proxy. Run this to get it installed and initialize the proxy:
$ kubectl apply -f https://raw.githubusercontent.com/kubernetes/dashboard/v2.5.1/aio/deploy/recommended.yaml

$ kubectl proxy
This will forward a port on your local machine directly to the Kubernetes dashboard. Once the proxy is up, you can access it at:

Token Auth
In a separate terminal session, you'll want to do the following to get the authentication token for Kubernetes Dashboard:
$ kubectl create serviceaccount dashboard-admin-sa
$ kubectl create clusterrolebinding dashboard-admin-sa --clusterrole=cluster-admin --serviceaccount=default:dashboard-admin-sa
$ kubectl get secrets
In the list, you should see an entry for dashboard-admin-sa-token-xxxxx. Use this command to actually view the token (replacing xxxxx as needed):
$ kubectl describe secret dashboard-admin-sa-token-xxxxx
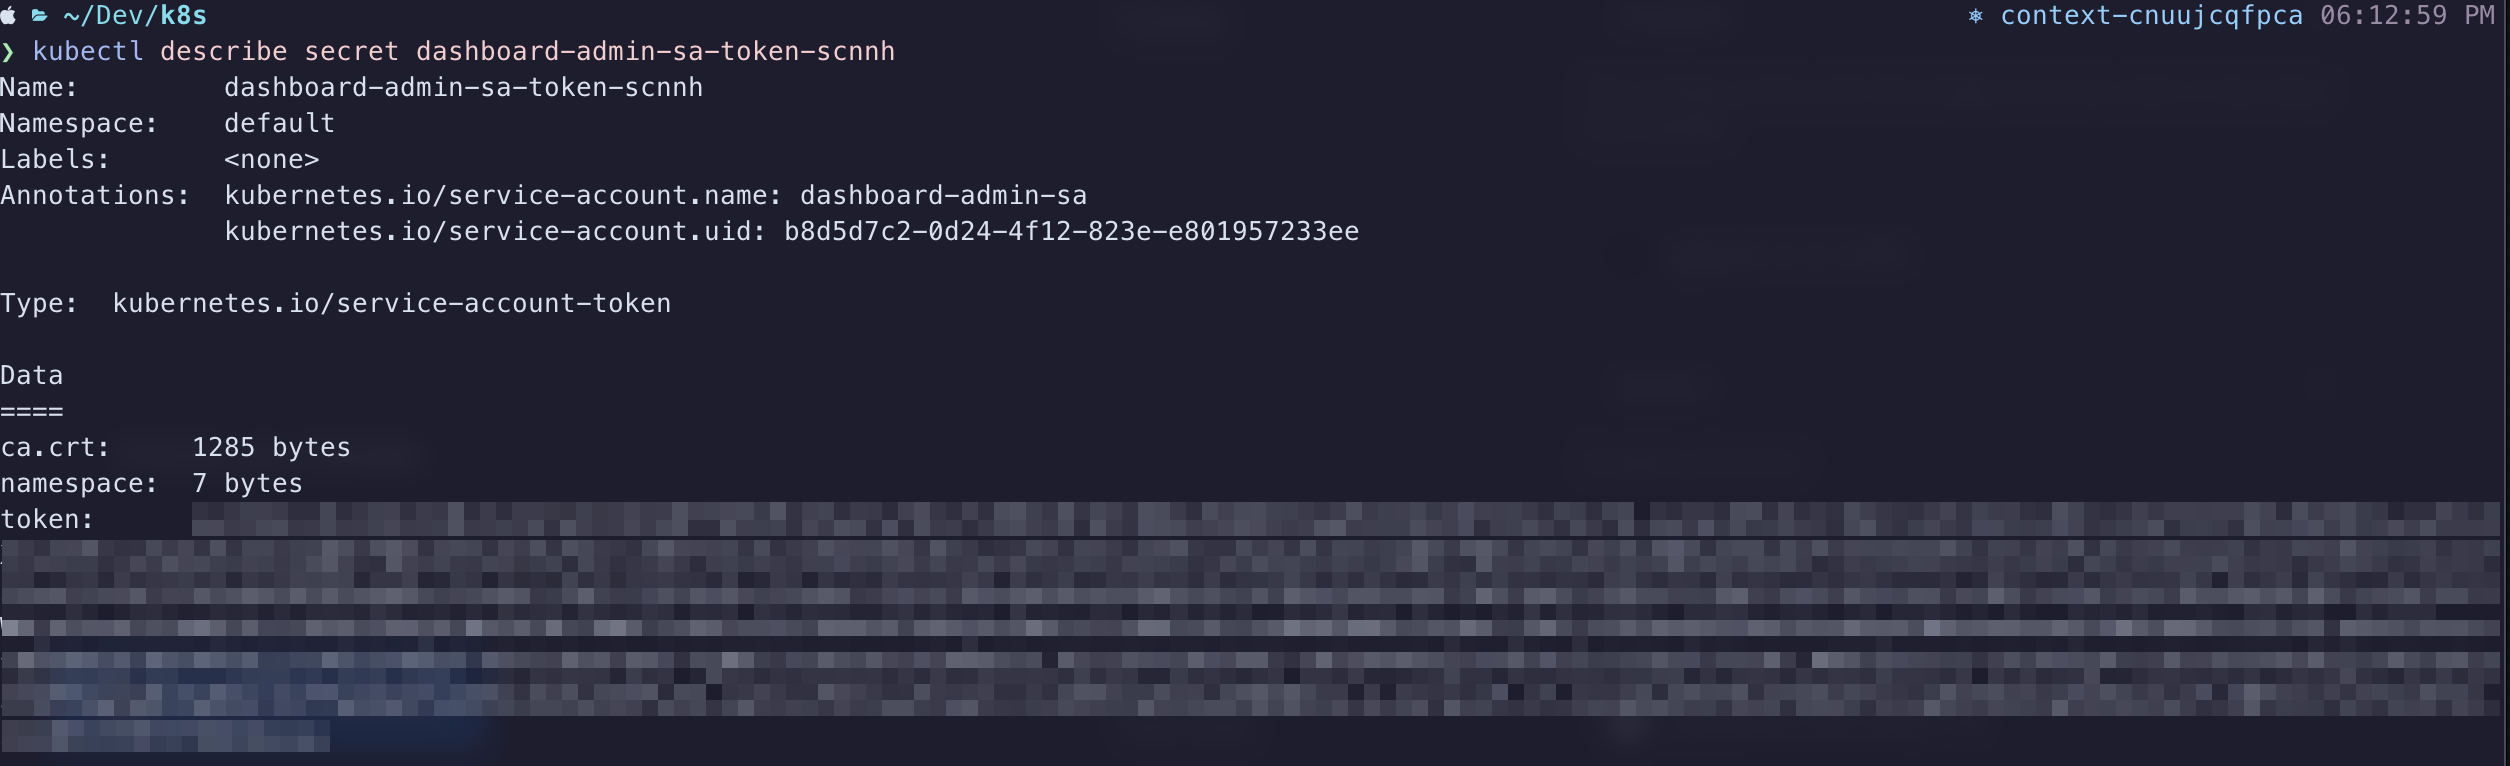
Copy the value from the token field and paste it into the Enter token field on your Kubernetes Dashboard sign-in screen. If all goes well, you should gain entry to the dashboard, where you'll have a birds-eye view of your k8s cluster. Feel free to click around in here to get acquainted with your cluster.
Traefik
I've been using Traefik in my Docker homelab for years now. It's a wonderful piece of software. It's a load balancer, router and reverse proxy in one. Their slogan, "Makes Netowkring Boring," is true. It makes this complex process extremely simple. That said, the documentation can be a little vague sometimes, so I've had to rely on lots of online tutorials to fully understand how it works. Once you've got it configured properly, you likely won't have to touch it all that often.
You installed helm right? Good. Let's use it to get Traefik installed on the cluster:
$ helm repo add traefik https://helm.traefik.io/traefik
$ helm repo update
Now let's create a file called traefik-values.yml. This file will store your customized variables, like your Cloudflare API key, Cloudflare email address and your Domain name. Replace values below as needed:
# traefik-values.yml
---
additionalArguments:
  - --entrypoints.websecure.http.tls.domains[0].main=yourdomain.tld
  - --entrypoints.websecure.http.tls.domains[0].sans=*.yourdomain.tld
  - --certificatesResolvers.le.acme.dnsChallenge=true
  - --certificatesResolvers.le.acme.dnsChallenge.provider=cloudflare
  - [email protected]
  - --certificatesresolvers.le.acme.storage=/data/acme.json

ports:
  web:
    redirectTo: websecure

env:
  - name: CF_API_EMAIL
    value: [email protected]
  - name: CF_API_KEY
    value: oHW0uldNtY0uLikeT0KN0www1337

ingressRoute:
  dashboard:
    enabled: true

persistence:
  enabled: false

securityContext:
  readOnlyRootFilesystem: false
  runAsGroup: 0
  runAsUser: 0
  runAsNonRoot: false

podSecurityContext:
  fsGroup: null
Issue this command to install Traefik with your customizations in place:
$ helm install traefik traefik/traefik --values=traefik-values.yml
The reason we're not using persistence for Traefik's data is twofold:
- Oracle's always free tier claims we can have 200GB of Block Storage, but they neglect to tell you that the Boot Volumes for our Nodes draw from that pool. Since the minimum size of a boot volume is ~47GB, we really have no leftover space to use for a persistent volume claim. This is also why we're using Longhorn inside the boot volumes.
- Traefik's data is basically: log files and a JSON file containing SSL cert definitions dynamically generated from LetsEncrypt. So long as we're not hammering the LetsEncrypt servers, we're safe.
You can view the Traefik dashboard by issuing this command:
$ kubectl port-forward $(kubectl get pods --selector "app.kubernetes.io/name=traefik" --output=name) 9000:9000
This will start a proxy to your Traefik's dashboard running on port 9000, but it's not exposed via a public endpont. While this proxy is running, you can view it at http://localhost:9000/dashboard/#/http/routers. Press CTRL-C when you're ready to stop the proxy and move on.
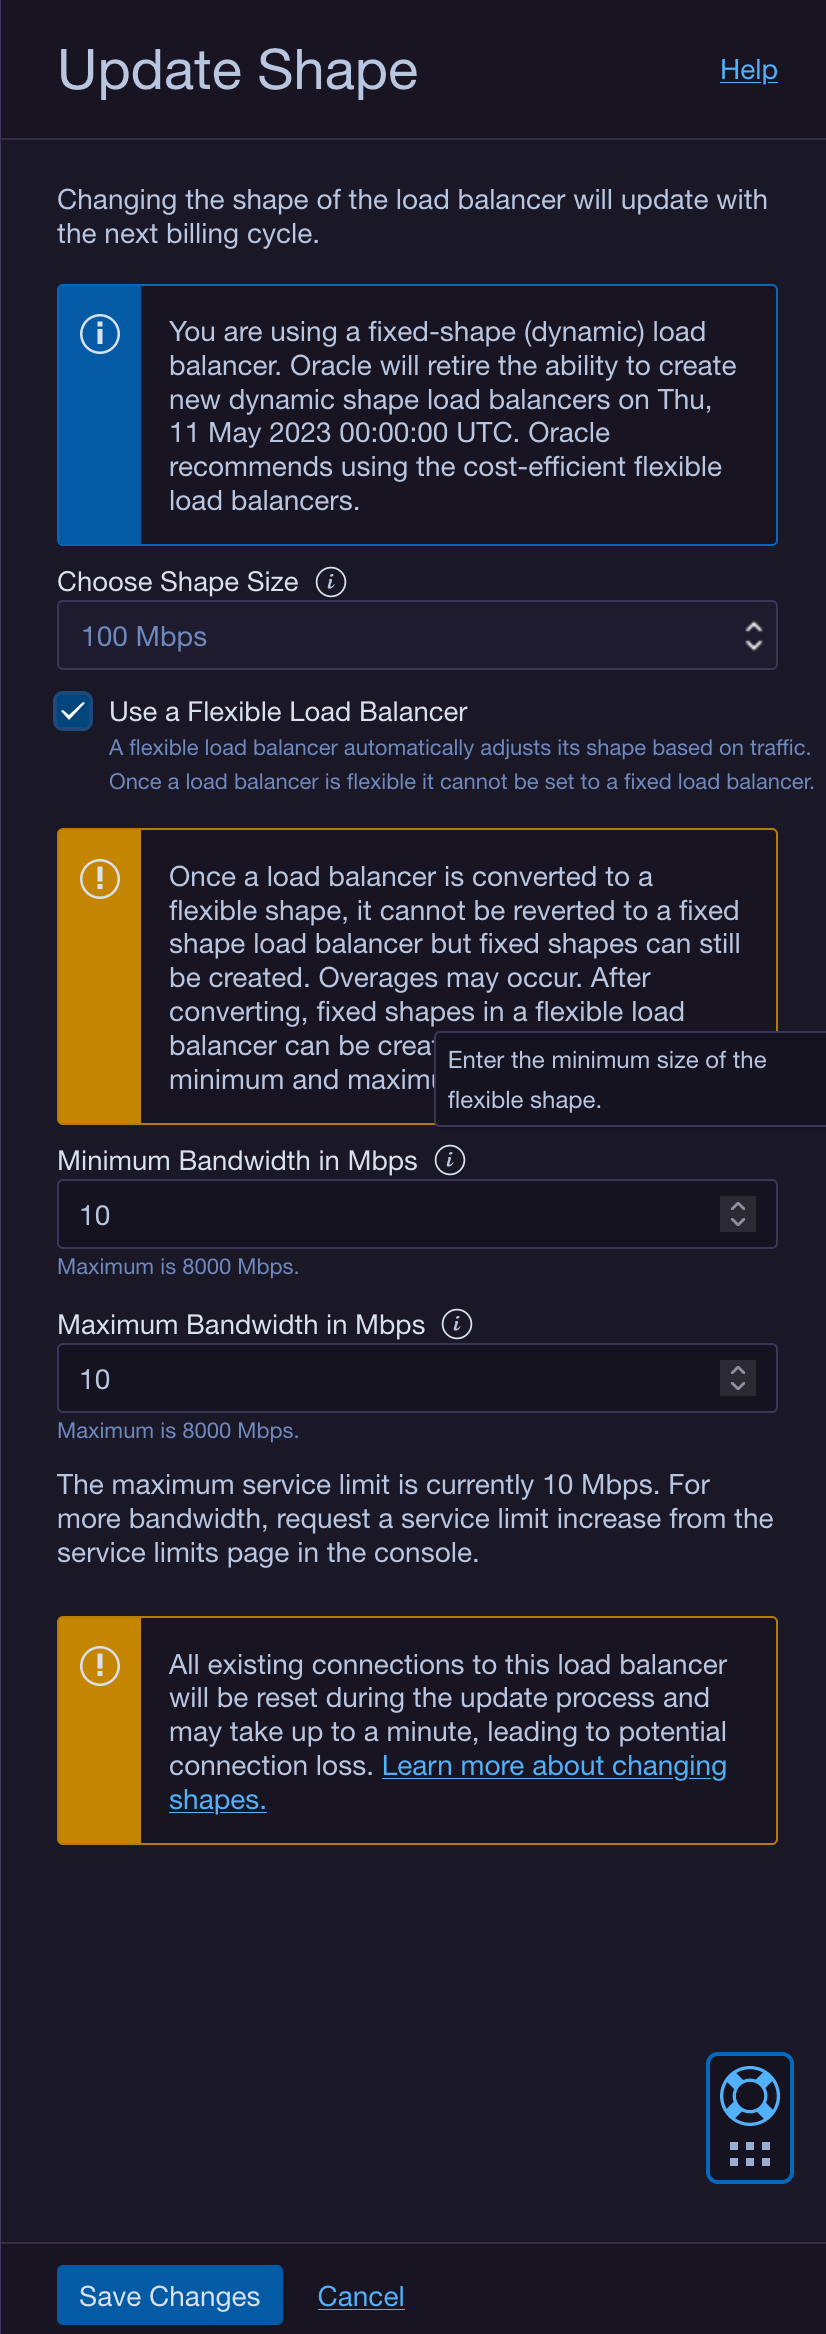
The Traefik helm chart automatically provisions a load balancer in OCI that isn't compatible with the always free tier. We have to make an adjustment. So open up your Oracle Cloud dashboard and navigate to Networking > Load Balancers. You'll see the automagically generated Load Balancer. Click on it to show it's details, then click the Update Shape button. You need to change it to a Flexible Load Balancer with 10 Mbps Minimum & 10 Mbps Maximum Bandwidth. Also take note of the IP Address, we'll need that for our DNS provider:

DNS Setup
Setting up Cloudflare as the Authoritative DNS provider for your domain name is relatively easy. I venture to say it's out of scope for this guide. Follow this guide to get started. Once you've got your DNS setup properly, you'll want to add a few records to point to the services your cluster will provide:
| Record Type | Hostname | Destination |
| A | yourdomain.tld | Load Balancer IP Address |
| CNAME | rancher.yourdomain.tld | yourdomain.tld |
| CNAME | blog.yourdomain.tld | yourdomain.tld |
Feel free to change those however your like. Perhaps you want your Wordpress at the root of the domain (with a www CNAME) instead. Just make sure you persist those changes as we continue below.
Rancher
Rancher is an excellent app we can use to manage our cluster. It's similar to the Kubernetes Dashboard we setup above, but it's much more "user friendly." We're going to expose it on a public endpoint at rancher.yourdomain.tld so you can access it anywhere.
Let's deploy the helm chart:
$ helm repo add rancher-latest https://releases.rancher.com/server-charts/latest
$ helm repo update
$ kubectl create namespace cattle-system
$ helm install rancher rancher-latest/rancher --namespace cattle-system \
    --set hostname=rancher.yourdomain.tld \
    --set bootstrapPassword=admin \
    --set ingress.tls.source=secret
Remember to replace your domain name in the hostname variable. This will install the Rancher service in a separate namespace called cattle-system. Namespaces are an organizational feature of K8s, allowing you to categorize services in their own self-contained unit. Your rancher deployment should come up within a matter of seconds. However, our load balancer (Traefik) doesn't yet know which HTTPS traffic it should proxy to our Rancher deployment. So, we need to define an IngressRoute for rancher.yourdomain.tld:
# rancher-ingress.yaml
apiVersion: traefik.containo.us/v1alpha1
kind: IngressRoute
metadata:
  name: rancher-tls
  namespace: cattle-system
spec:
  entryPoints:
    - websecure
  routes:
    - kind: Rule
      match: Host(`rancher.yourdomain.tld`)
      services:
        - name: rancher
          port: 80
  tls: # This route uses TLS
    certResolver: le # Uses our certificate resolver to get a certificate automatically!
$ kubectl apply -f rancher-ingress.yml
Now you should be able to open https://rancher.yourdomain.tld and be greeted by the Welcome to Rancher page. Follow the wizard to setup your admin account. Remember, the admin password is "admin" (or whatever you set "bootstrapPassword" to in the helm command above). Please please please set a secure password!
Longhorn
This is where things diverge from the norm. You wouldn't want to do this in a real-world production environment. I'm still trying to come up with a better workaround. We're going to use Longhorn as a block storage provider inside the boot volume of our nodes. The reason we do this is because we're limited to 200GB Block Storage with the Oracle always free plan & each of our nodes' Boot Volumes are ~47GB. If we have 4 nodes, then that's 188GB of the 200GB limit. They don't tell you Boot Volumes count towards that 200GB quota, so watch out!
We can setup Longhorn entirely from the Rancher GUI. So open up your browser to your new Rancher instance and navigate to Apps > Charts and find the entry for Longhorn in the list:
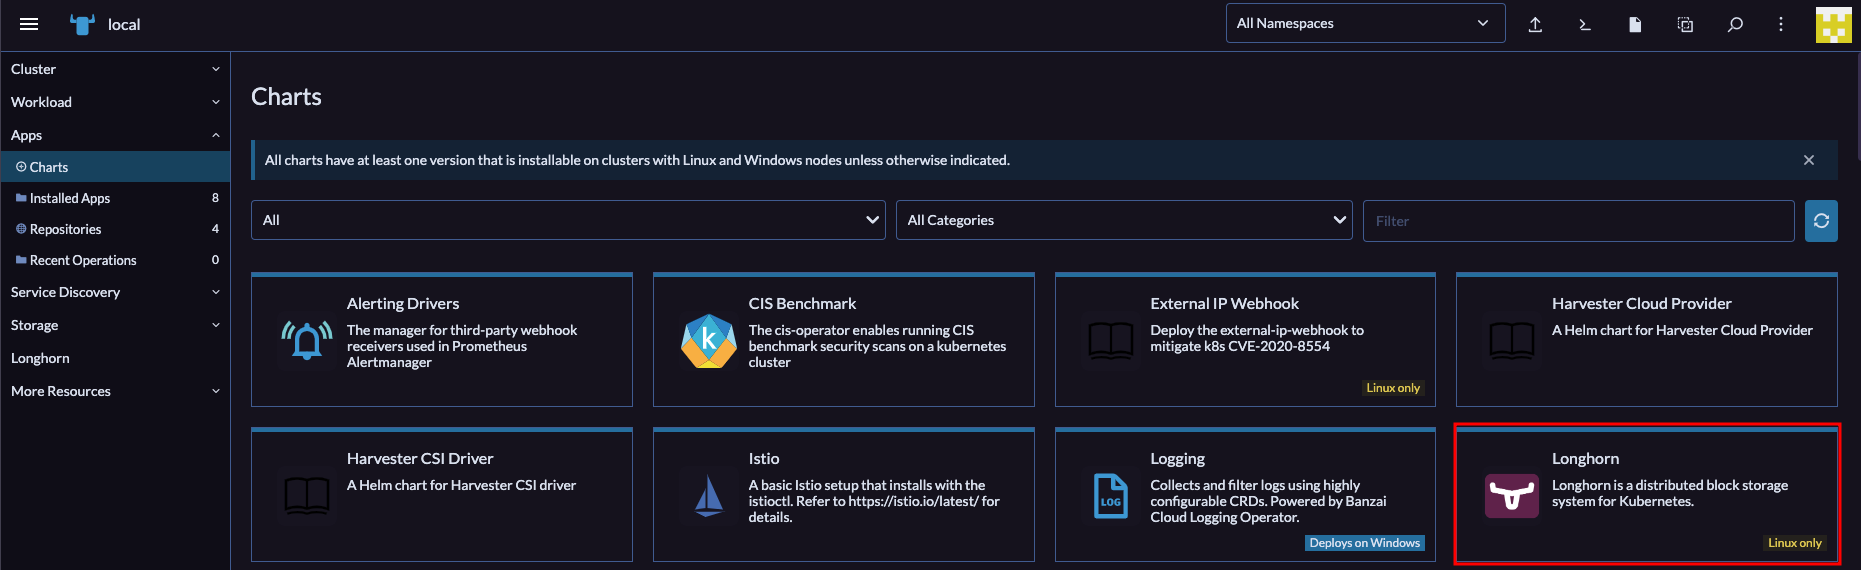
Click on that to open up the details of the Helm Chart. Next, select the Install button in the top right corner. Now click through the prompts and complete the install. Once that's done, you should have a Longhorn entry in Rancher's left sidebar. Open that, then click the Manage storage system via UI button that shows next. You should now be seeing the Longhorn web UI. Pretty! Click around a bit to explore. There's not much else for us to do here at the moment, our volumes are going to be created dynamically in the next section.
Wordpress
I'm using Wordpress as an example because it relies on at least 2 containers to function: one for the web server & one for the database server. Wordpress is also a stateful application, meaning data has to be preserved between deployments. Most real-world scenarios will involve multiple containers that have to communicate with one-another and persist data between deployments. If data wasn't persistent, it would be lost anytime our application restarted or moved to a different node.
The Wordpress helm chart offered by Bitnami is not compatible with our ARM64-based nodes in OCI, so we're going to have to build this ourselves. Don't worry, it's pretty easy!
Go ahead and download this configuration file for our stack & open it in your editor. You're going to want to change some things: the hostname blog.yourdomain.tld should be your own domain that you configured above; CHANGEME should be the password you want to use for the Wordpress MariaDB user; CHANGEME2 should be the password of the MariaDB root user; 5Gi is the size of the PersistentVolumeClaim for both our Wordpress volume & MariaDB volume (remember we're using the node's boot volume, so we don't want to make these too big). Once you've made your changes, go ahead and issue this command to start the stack:
$ kubectl apply -f wordpress_mariadb.yml
If everything went well, then after a moment or two you should be able to navigate to https://blog.yourdomain.tld and be greeted by the Wordpress installation page. Setup your admin username and password et voila! You should now have a fully functioning Wordpress website hosted on Kubernetes in the Cloud. For free!
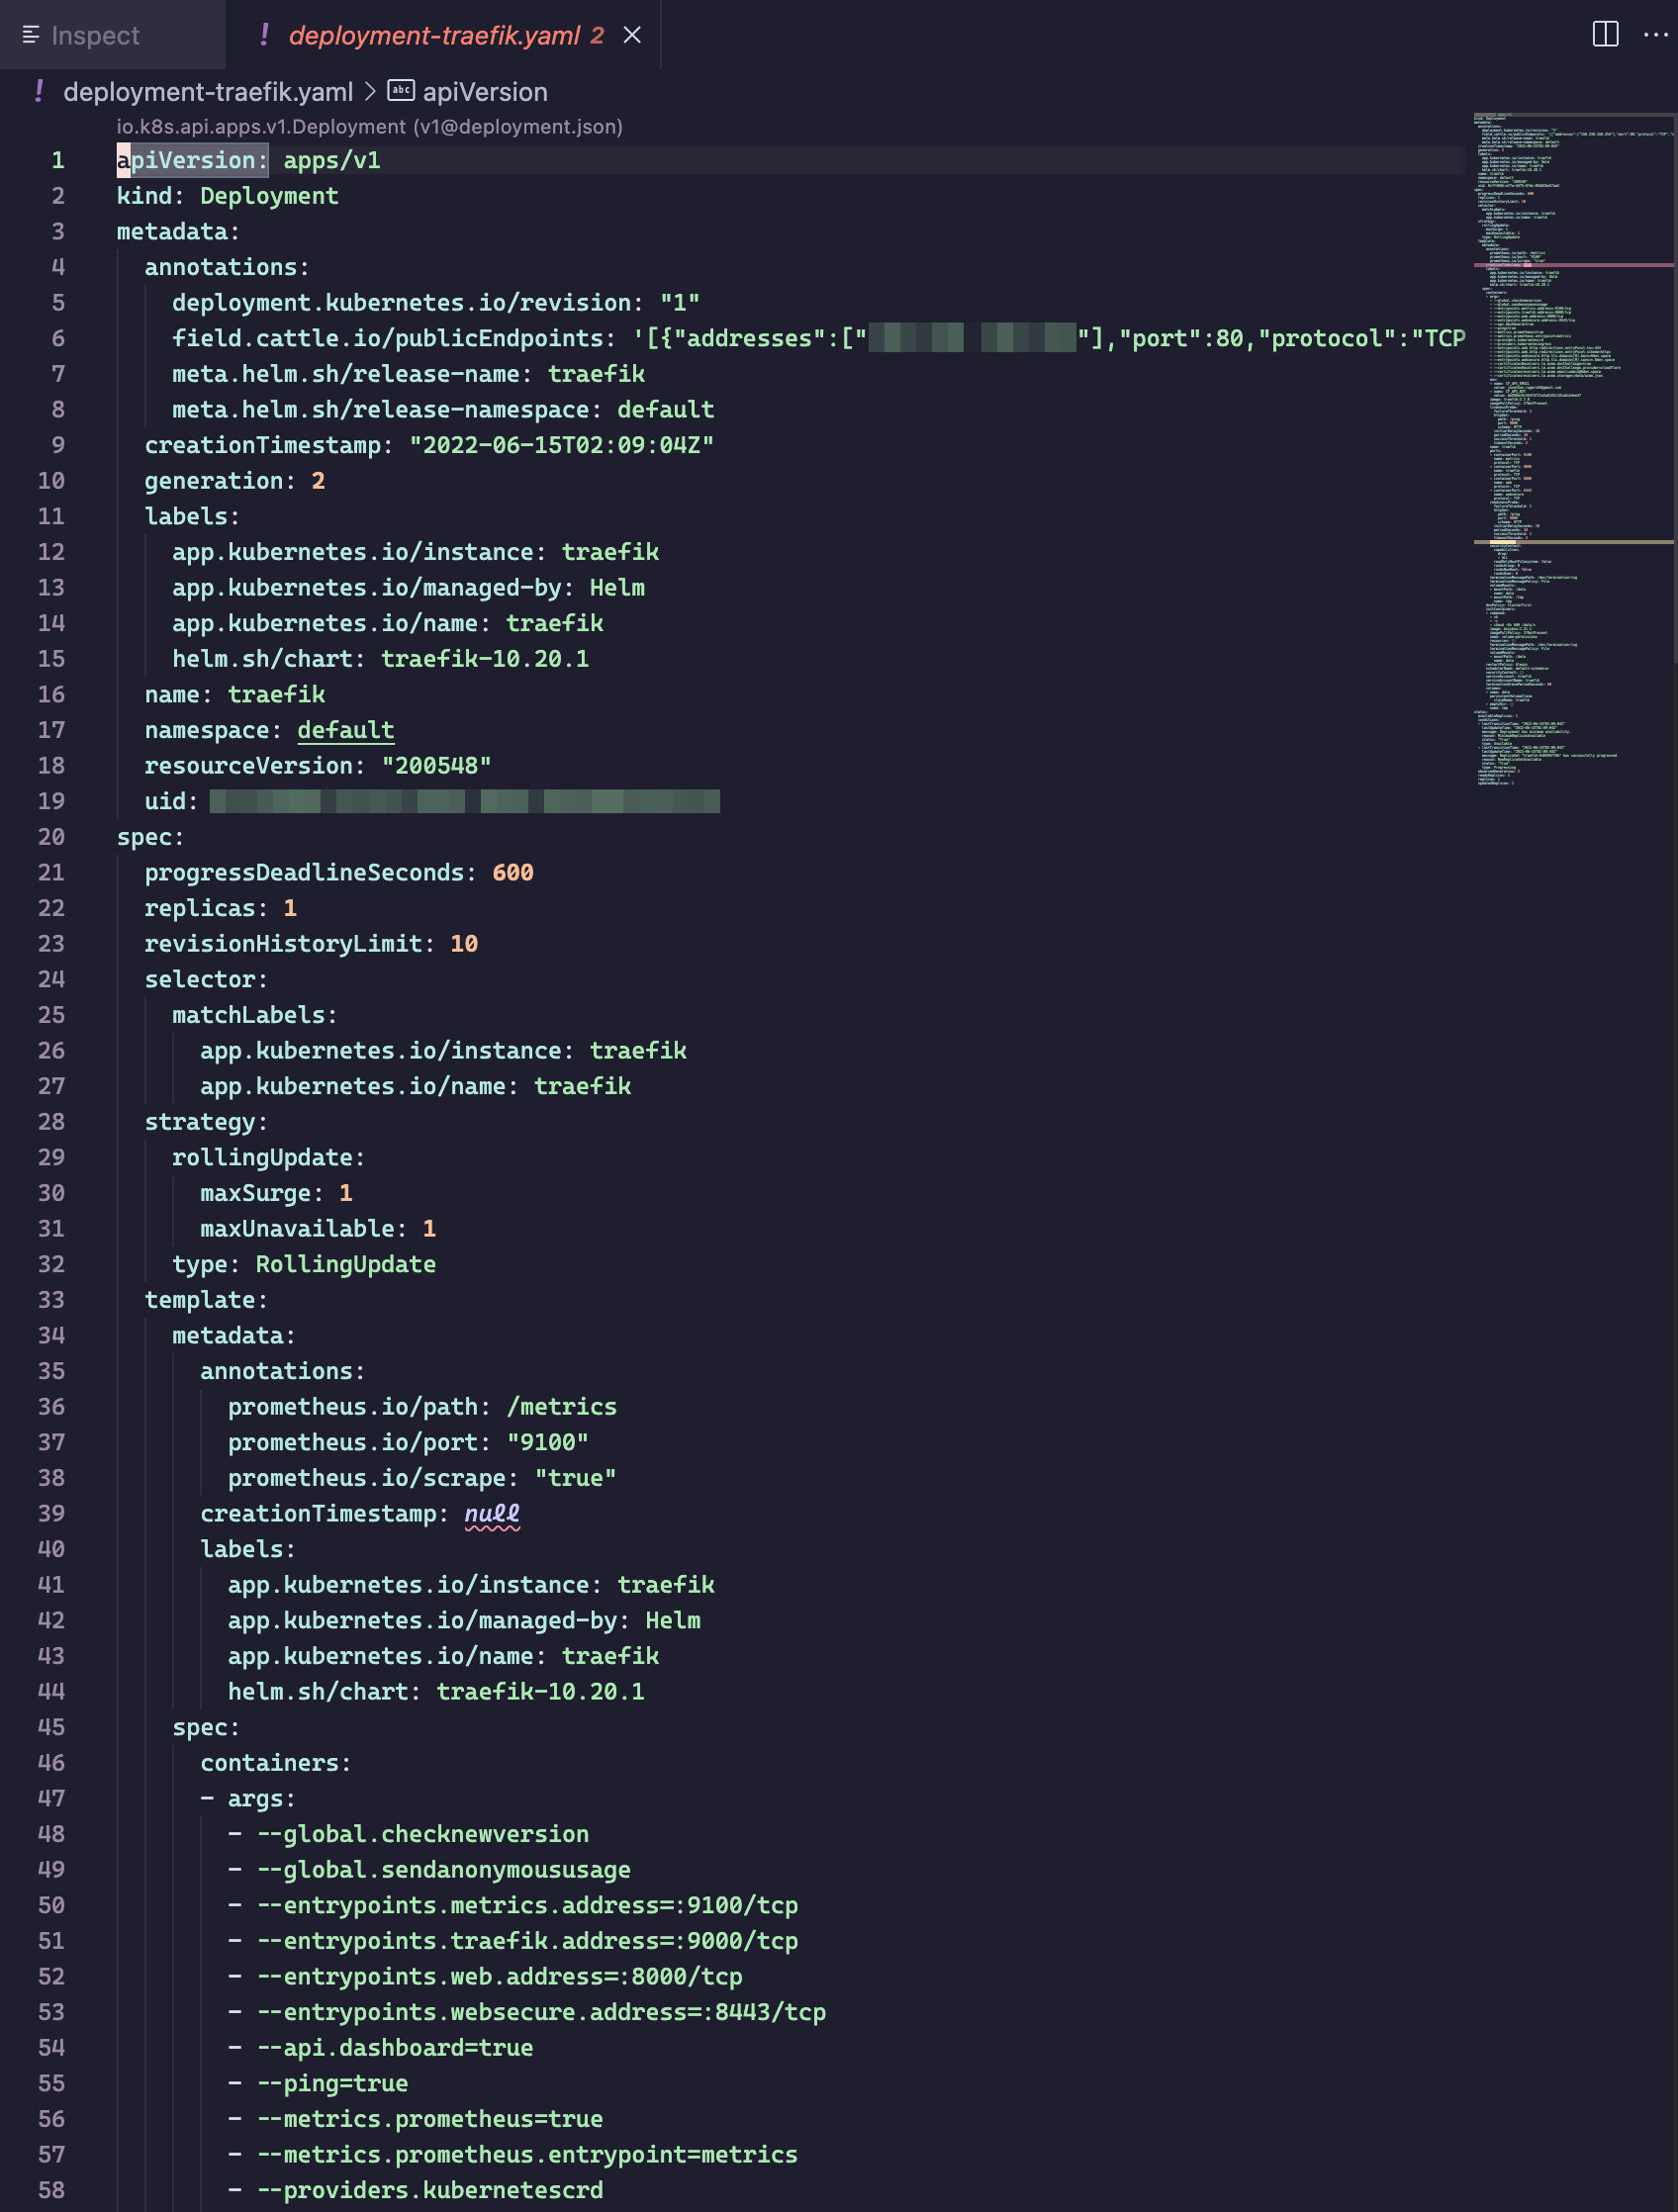
Bonus: Visual Studio Code Extension
Once you have kubectl configured properly, you can install the Kubernetes extension for Visual Studio Code to get access to a tree-view of your cluster. You can drill down and inspect the YAML of every aspect of your cluster: nodes, workloads, network, storage. It's pretty cool! Also, it'll help you to better understand what's going on "under the hood" and how everything fits together.
Closing
Now you should have a fully operational Wordpress installation running on a kubernetes cluster in the cloud. Neat! You can take the concepts described in this post and expand upon them to your heart's content. I'm still a K8s n00b myself, so please let me know if you have any improvements to this setup! Remember, some of the practices we used were kind-of unorthodox, but it was the only way to stay within to scope of the always free plan. If you have any improvements or suggestions, please let me know in the comments!